
Integration ability
Integrating Airtable and Stripe simplifies financial management by automating invoicing, reporting, and payment tracking. This setup ensures all transactions are recorded in real-time, providing an up-to-date view of cash flow and financial forecasts. Additionally, invoices can be sent directly to customers' emails with just a few clicks, allowing businesses to easily monitor payments. The automated sync between Airtable and Stripe ensures data consistency and eliminates manual errors, while also offering convenience and transparency in the billing process.
With this step-by-step guide, you'll learn how to easily connect your Airtable base to Stripe, enabling seamless invoicing and payment tracking for your customers. Follow along, and you'll be able to automate your financial workflows without the need for external tools or technical expertise.
Airtable Database Set up for Automation
Airtable sets up a database with the tables necessary for data processing. It works as a single source of truth for products, customers, and orders. The key tables we recommend include:
- Inventory Items
- Order Entry
- Orders (the main table with invoices)
- Clients (information about customers)


How Does Automation Work?
Step 1: Airtable Automation
First, we set up the automation directly in Airtable. To kick things off, we need a field to act as a trigger. Let’s use a Checkbox field.
- Trigger type: "When record matches conditions"
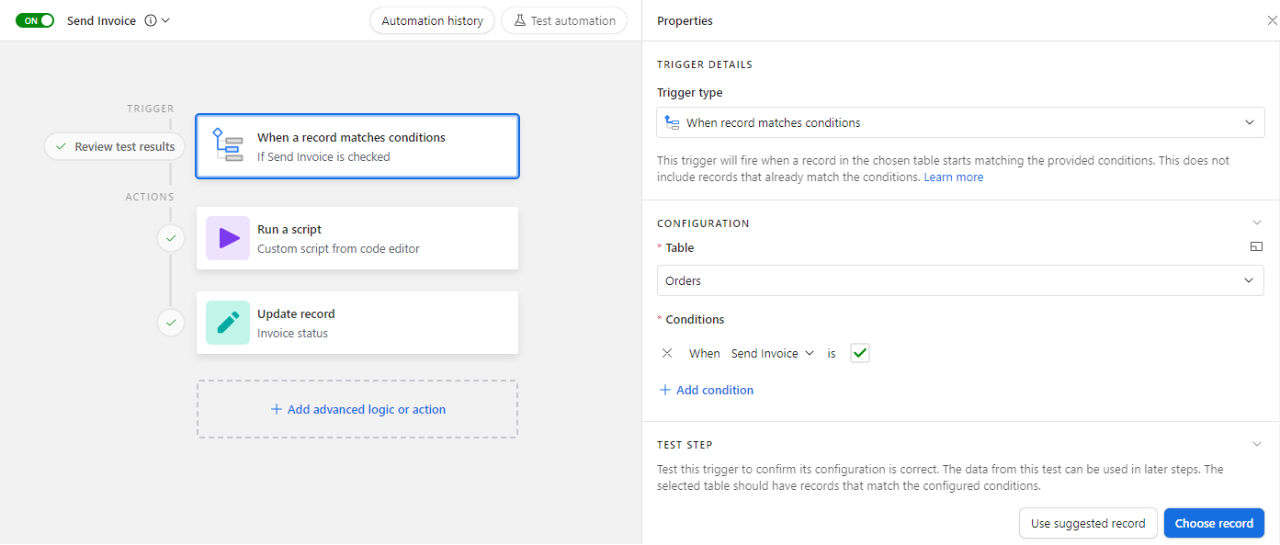
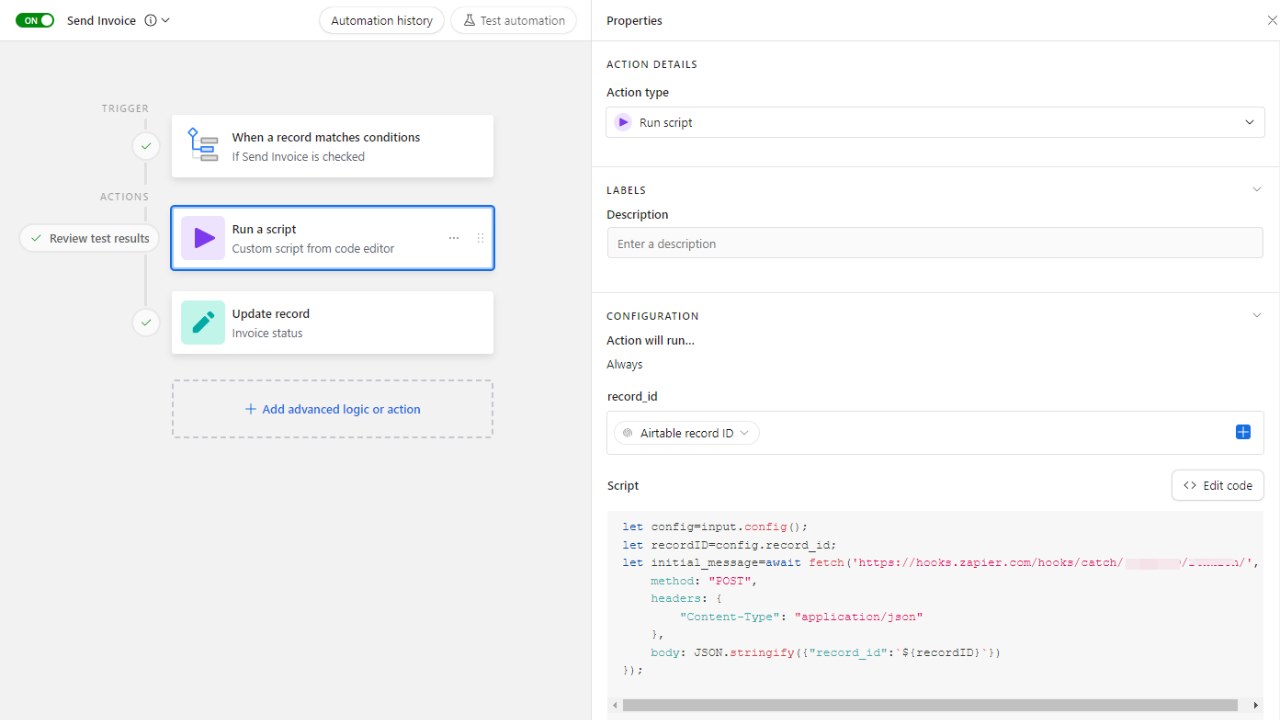
- We’ll use a script module to send the record ID to Zapier. When the checkbox is checked, the automation starts in Airtable and sends the record ID to Zapier, updating the payment status to "Processing."
let config=input.config();
let recordID=config.record_id;
let initial_message=await fetch('https://hooks.zapier.com/
hooks/catch/18924509/26xxxxx/', {
method: "POST",
headers: {
"Content-Type": "application/json"
},
body: JSON.stringify({"record_id":
`${recordID}`})
});
Step 2: Zapier Automation
- In Zapier, create a webhook to receive data from Airtable
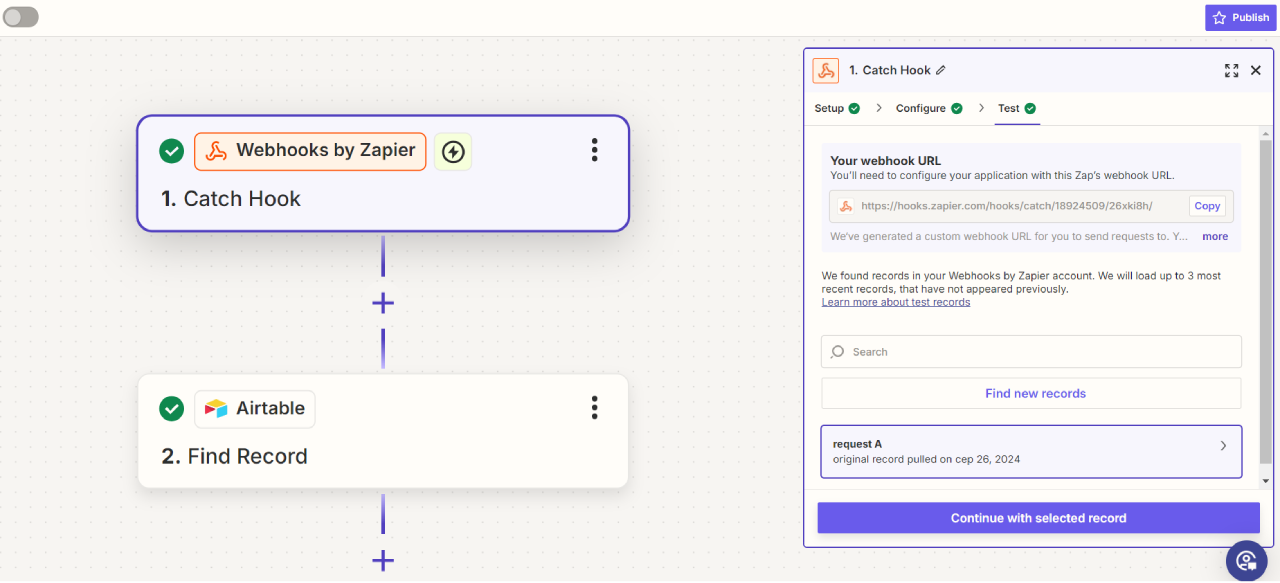
- Set up the next step to retrieve data for a specific order. Choose the database and table, then provide the record ID from the previous step.
.png)
- Use the data to find a client in Stripe based on the email address in the database.

- Create an invoice in Stripe using the customer ID from the previous step. Note: Stripe requires prices to be in cents, so in Airtable, we’ve added a column with a formula to convert prices from dollars to cents.
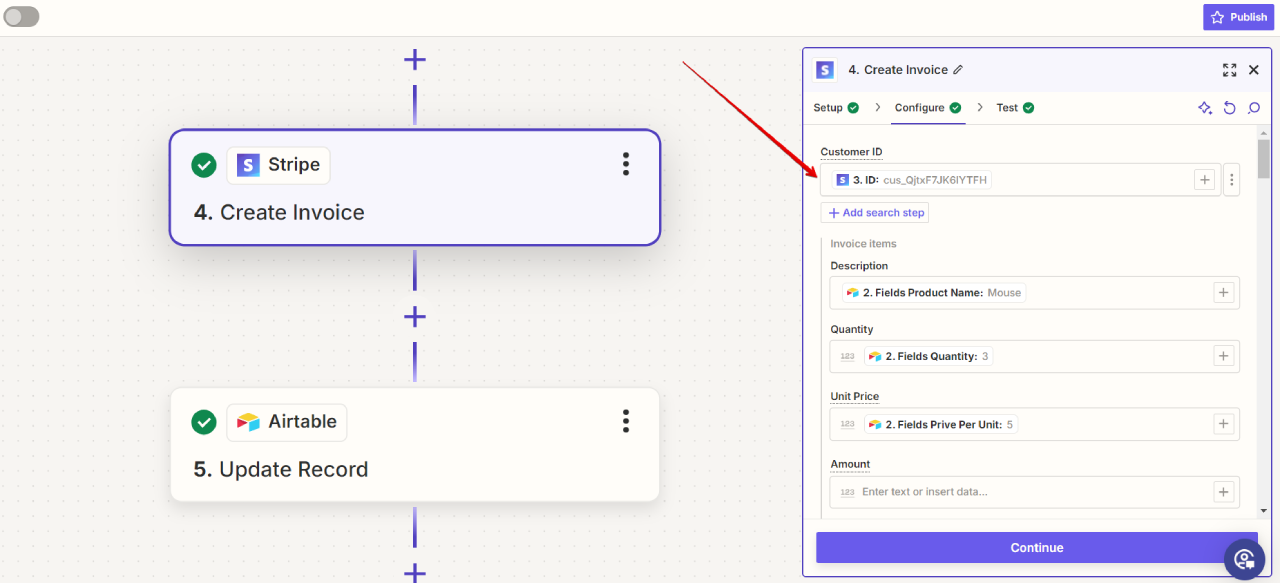
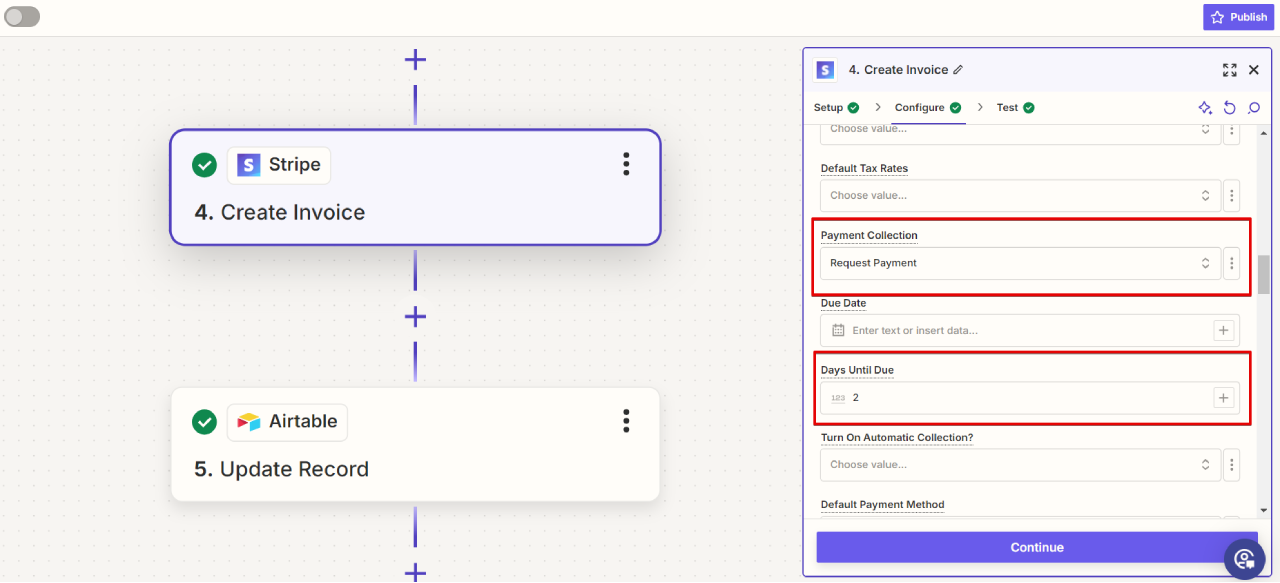
- Payment collection - to Request Payment and specify the payment deadline for the invoice.
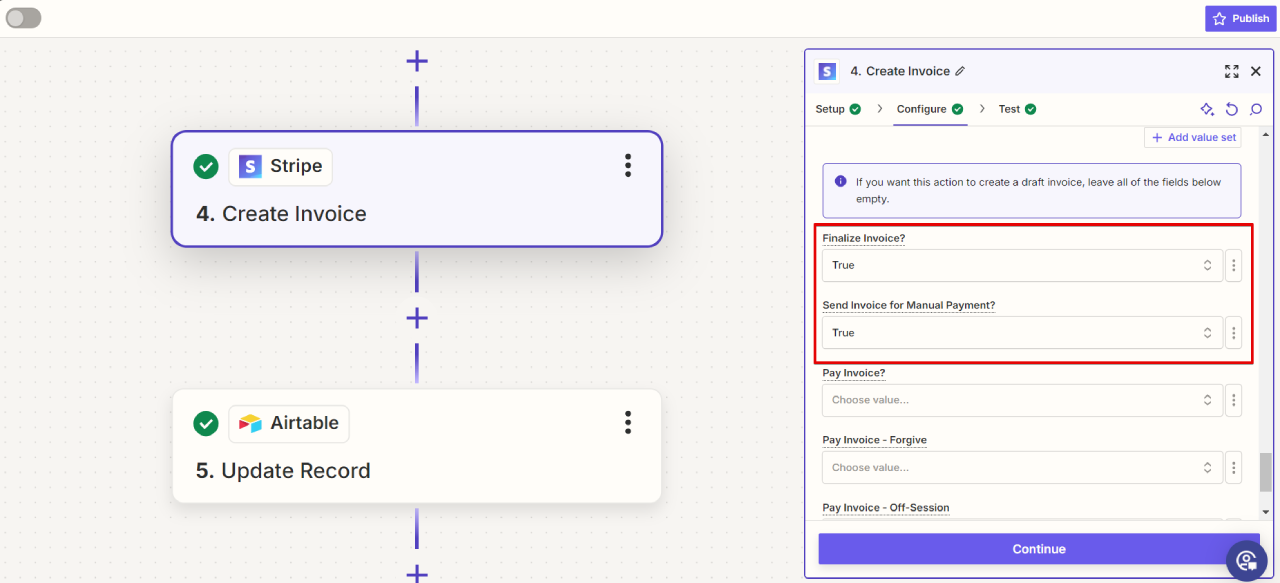
- Set Finalize Invoice to True and Send Invoice for Manual Payment to True.
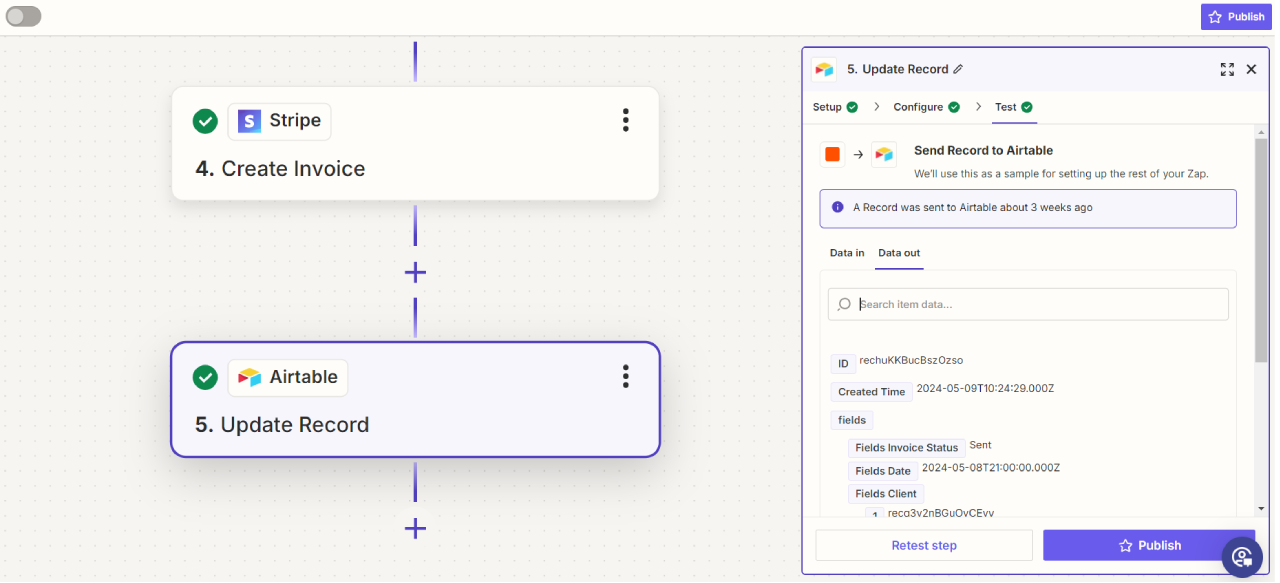
- Automatically update the order status to "Sent" using a final automation step.


.png)


